in 2017 Microsoft launched Microsoft Bookings globally for creating easy online booking calendars for your business.
Now they have also launched “Bookings with me” for 1:1 bookings.
What’s the difference between Bookings and Bookings with me?
Microsoft Bookings is for managing scheduling for a group of people. Where as Bookings with me integrates with your Outlook calendar and can only be used for 1:1 meetings.
Think of Bookings with me as a direct replacement of Calendly.
Bookings will create a new mailbox for each Bookings page, where as Bookings with me just connects to your existing calendar and mailbox.
This is important, because if you try to create a “Bookings” calendar that matches the mailbox name of one of your current users you’re likely to get an error saying the proxy address is already used. So if you’re wanting to create an online booking page so people can book 1:1 meetings with yourself, then use Bookings with me, instead of Bookings.
How to Setup Bookings with me
Setup is easy. (Firstly, you’ll need to have a Microsoft 365 license, and have Microsoft Bookings enabled under “All Apps”, in the admin console, which it should be by default).
Here’s how to set it up:
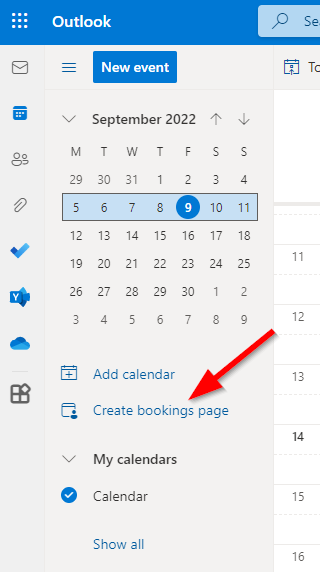
- Open Outlook online
- Click on your calendar
- Click “Create bookings page”.
- Setup public or private booking options.
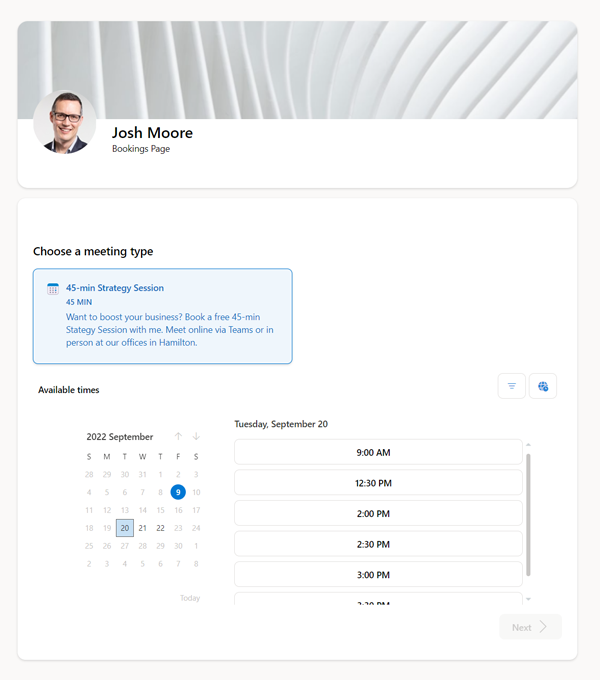
Public vs Private Appointment Options
Public appointment options will be seen by anyone who visits your Bookings with me page.
Private appointment options will only be seen by people who you share the exact link for that booking.
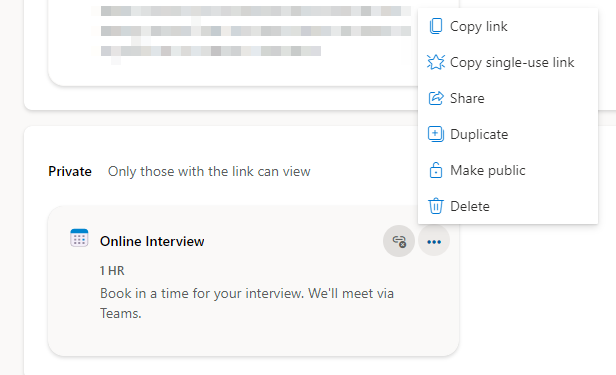
No Sharing Links Available?
When you first create your page, if you create a private booking option you will see an message that says there are no share links available for that appointment.
This is because your bookings page is still being created. If you look at the top right of your Book with me page (https://outlook.office.com/bookwithme/me) you’ll see the “Share” button is greyed out. Just give it 20 mins and then the button will turn blue when your page is built and ready for the public to see it.
When that is complete, you’ll be able to click the three dots on the private appointment type and get a link to share.
Video Tutorial
Here’s a simple video tutorial that walks you through the process.