If you’re anything like me you will have multiple accounts set up in Microsoft Outlook. I can’t tell you how many times I have emailed a client from my personal email without thinking. There’s a simple fix for this problem that involves three simple steps.
1. In Outlook, turn Developer mode on
Most people never need the Developer tab, so it is usually disabled.
Start Now:
- Click on the File tab, and select Options
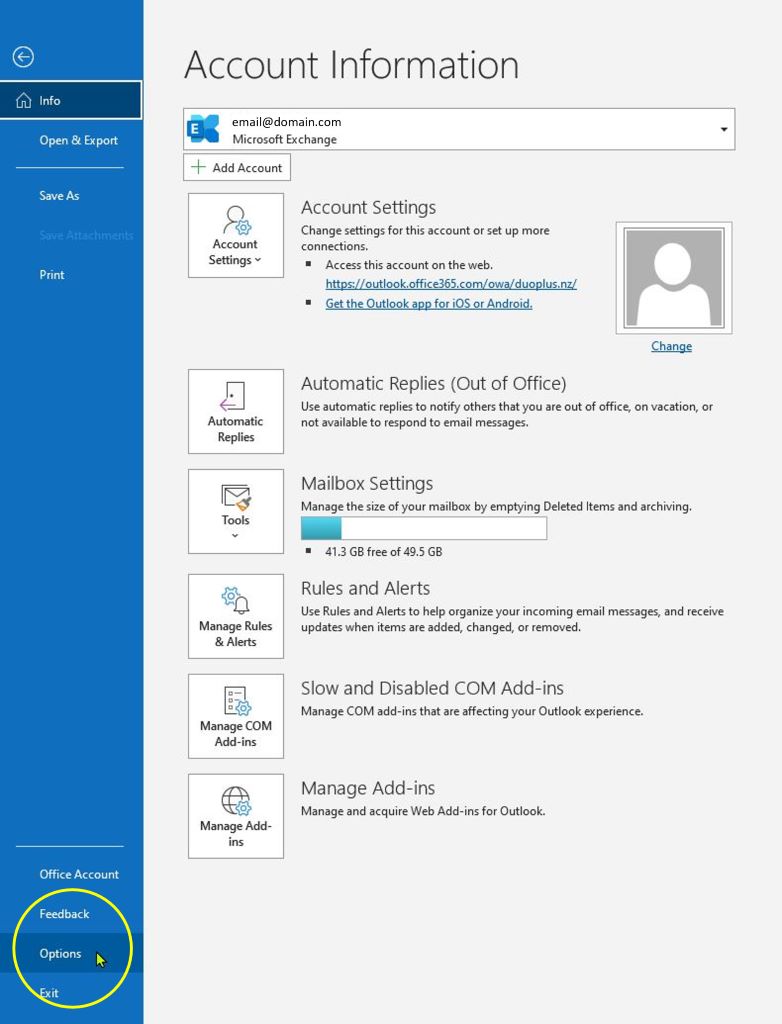
- Click Customize the Ribbon.
- Under Main Tabs on the right-hand side, tick the Developer option.
- Click OK.

2. In Outlook, use Visual Basic Code to Create the Prompt
The next step involves some code, but you can simply copy and paste it from below.
Start Now:
- In Outlook, select Visual Basic from the Developer Menu.

- In the left-hand panel, select ThisOutlookSession. This will create a new macro / Private Subroutine.
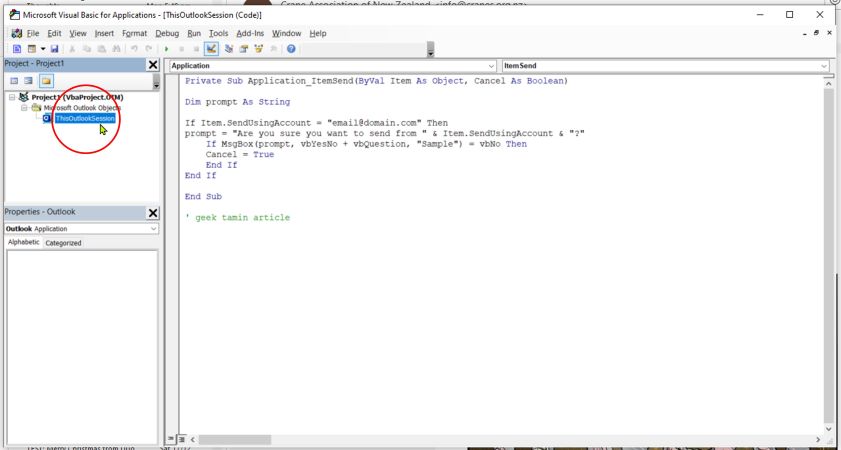
- Copy the following text into the Macro. Substitute email@domain.com with your personal email address. You can also change the text of the confirmation prompt as needed.
Private Sub Application_ItemSend(ByVal Item As Object, Cancel As Boolean)
Dim prompt As String
If Item.SendUsingAccount = “email@domain.com” Then
prompt = “Are you sure you want to send from ” & Item.SendUsingAccount & “?”
If MsgBox(prompt, vbYesNo + vbQuestion, “Sample”) = vbNo Then
Cancel = True
End If
End If
End Sub
- Save the routine by typing CTRL + S, or clicking the Save icon on the toolbar.
- Close the Visual Basic window.
At this stage, test your macro. Create and attempt to send an email from the email account from this step.
3. Create a Self-Signing Certificate
Outlook protects your emails, etc by disabling all macros from running on your computer, unless they have a certificate. In this case, you will create your own certificate, which only works on your computer.
Start Now:
- In Windows 10, start File Explorer.
- Navigate to the following folder
C:\Program Files (x86)\Microsoft Office\root\Office16.
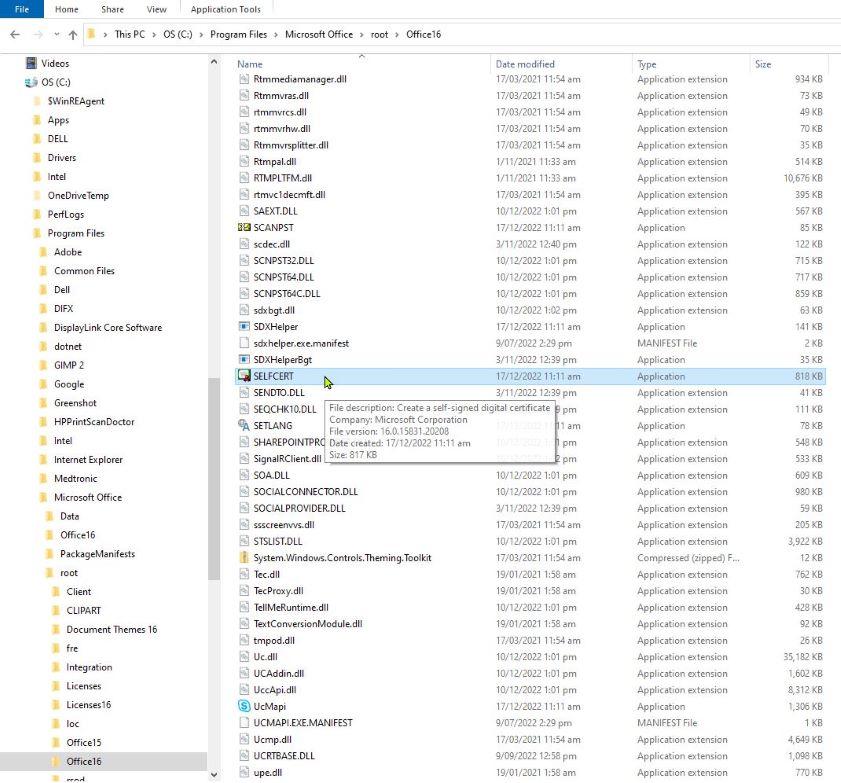
- Click SelfCert.exe. The Create Digital Certificate box appears.
If you don’t find it in this folder, try this folder:
C:\Program Files\Microsoft Office\root\Office16
- Type a meaningful and unique name for your certificate that you will remember: E.g. outlook-email-confirmation
Remember this certificate name.
In Visual Basic, Apply the Certificate
- In Outlook, select Visual Basic from the Developer Menu.
- In Visual Basic, select Digital Signature from the Tools Menu.
- Select the certificate you created and click OK.
That’s all there is to it. Enjoy
.